Written by: Panagiotis Vardakis, EBF Level 3, USBC Bronze, and National Coaching
School Cat C coach
Updated: July 21, 2026.
In modern bowling, pattern sheets are everywhere. They are posted online,
shown before tournaments, and shared in team chats.
Yet, for many bowlers they remain nothing more than a graphic, filled with numbers and shapes. They look at it - and then bowl the way they always do. That is where coaching comes in.

This article is not a rulebook. Get this - there is no one correct line.
Instead, this is how I teach bowlers to build
a logical starting plan from a pattern sheet.
It is based on years of
observation, mistakes, learning, and what I consistently see working with
youth, amateurs, and competitive bowlers.
The goal is simple - make the pattern sheet useful - not intimidating.
Pattern Sheet Is a Guide, Not a Command
Before we talk about boards, arrows, and breakpoints, we need to remove one
myth.
The pattern sheet does not tell you where to stand and throw your
bowling ball. What it actually tells you is:
- Where oil is heavier
- Where oil is lighter
- How long the oil pattern is
- Where friction will eventually appear
In other words, it shows possibilities, not instructions.
When I teach bowlers, I always say that the pattern sheet doesn’t give you the right answers where to play. It gives you the starting question. Your job is to turn that question into a smart first line.

Step 1: Read It Like a Bowler, Not an Engineer
When I first look at a pattern sheet, I focus on only three things:
- Length – how far the oil extends
- Shape – is it flat, house-shot, or sport pattern
- Ratio – how much more oil is in the middle compared to the outside
Forget the rest. At least at the beginning.
The Simple Guide of Length
- Short pattern → the ball hooks earlier
- Medium pattern → more balanced reaction
- Long pattern → the ball skids longer
In formula it looks like this:
Exit point ≈ Pattern Length – 31
For example:
- 40 ft pattern → 40 – 31 = 9 board
- 43 ft pattern → 43 – 31 = 12 board
- 37 ft pattern → 37 – 31 = 6 board
This does not mean you must play exactly there. It simply gives your brain a smart first target.
Step 2: Build the Line from the Breakpoint Backward
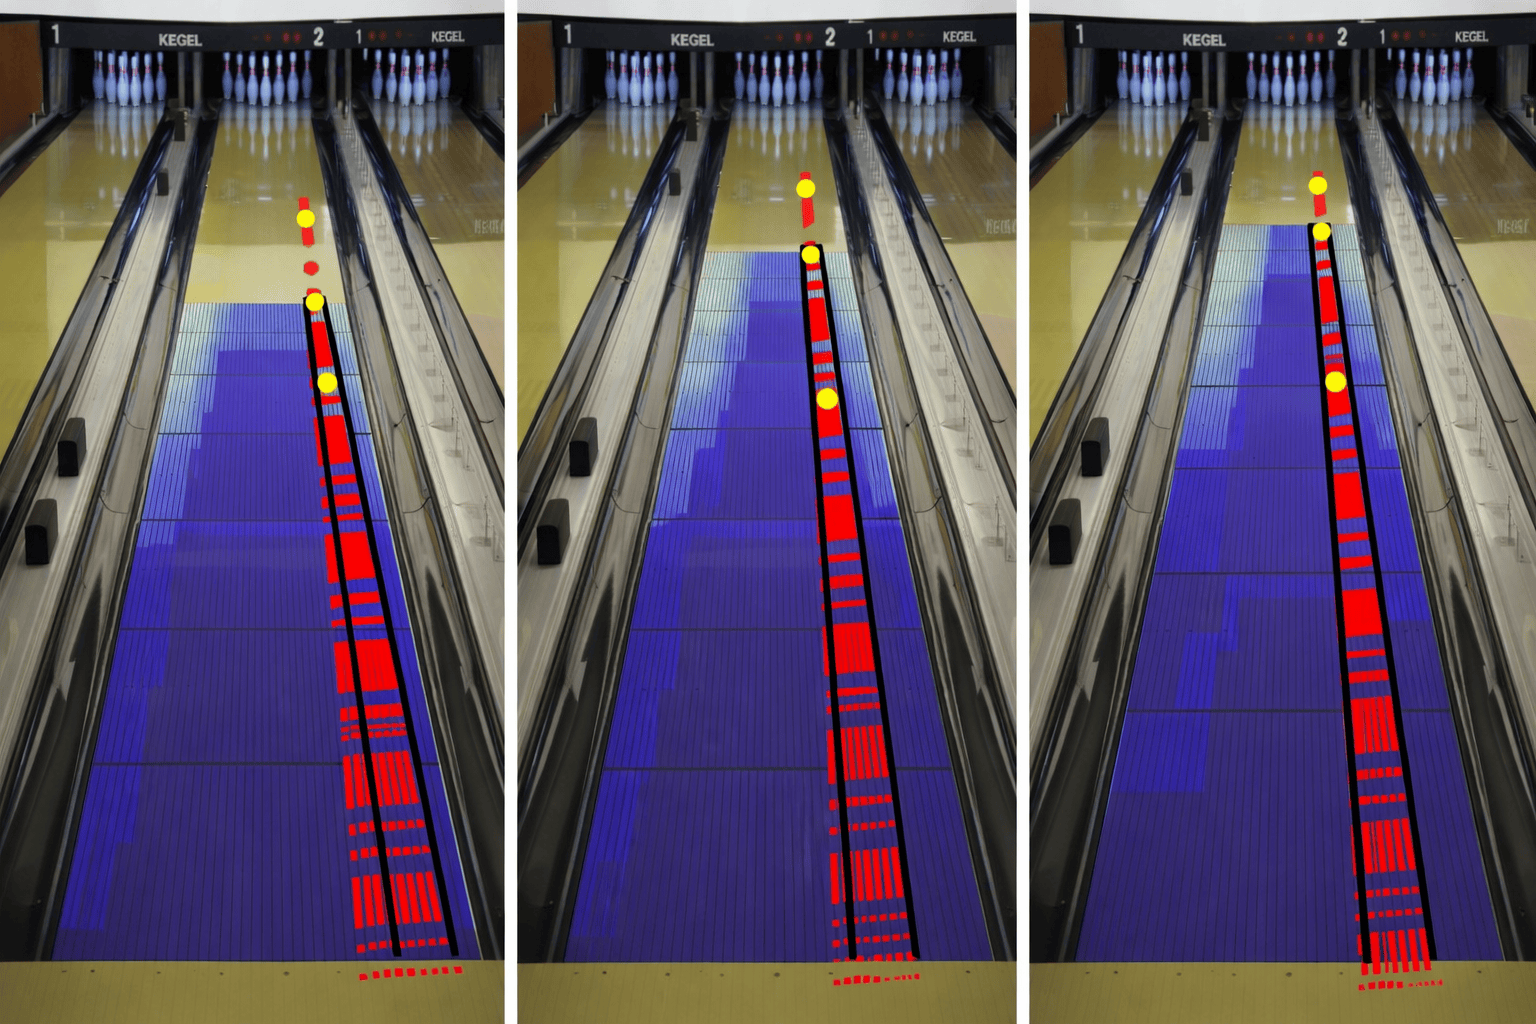
Most bowlers ask - where should I stand? I teach the opposite question: Where should the ball change direction?
One simple guideline I learned from world-class coaches is that the breakpoint
is usually located around 45 feet down the lane.
Horizontally, it is often
about three boards inside the last board before the pattern flattens. That
gives you a starting reference.
Also, I always clarify something important - the term breakpoint is
misleading. It is not a single point. It is an area.
Breakpoint is typically
3–5 feet long and 2–3 boards wide.
So the process becomes:
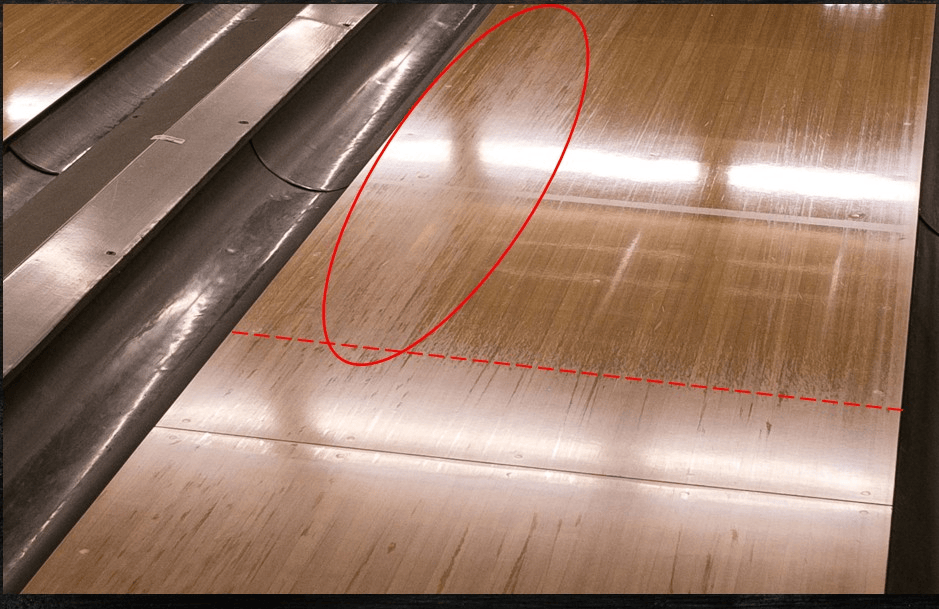
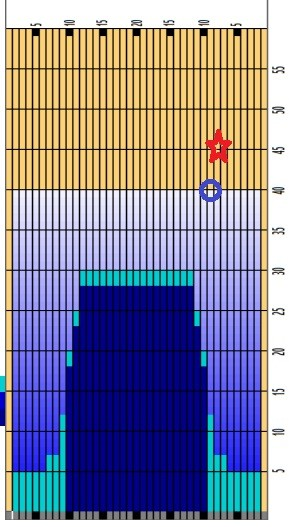
- Choose your breakpoint area (a blue circle in a picture below)
- Identify your exit point (a red star in a picture below) and extend the line back toward the foul line
- Then determine your starting position
Sometimes, the calculated line may look extreme or unrealistic.
That is why we
always consider a margin of error of a few boards on each side.
What About the Arrows?
Up to this point, you may notice I haven’t mentioned arrows. That is
intentional.
I consider arrows to be a visual reference within your chosen line - easier to
focus on because they are closer to your release.
Depending on the athlete’s level, more variables come into play: lane surface,
oil loads, transition, combined volumes.
But what we covered so far is enough
to build a strong and logical starting plan.
Step 3: Match the Line to the Ball - Not Your Ego
One mistake I see constantly is that when the pattern is long, players immediately think they must play inside.
No.
You must play what your ball, speed, and rev rate allows you to play. I ask bowlers to evaluate:
- Is my ball too clean for this line?
- Is it reading too early?
- Is it missing the breakpoint and not recovering?
My guiding principle is simple. The best line is the one that:
- Clears the front part of the lane
- Reads the midlane without forcing technique changes
- Maintains energy through the pins
It is about finding the best line with the biggest margin of error for the given player, not the line that looks impressive on social media.

Step 4: Your First Line Is a Test - Not a Marriage
This one is critical. Your first line is not your final line. It is a test shot with purpose.
When I teach this, I say: You are not trying to strike; you are trying to learn something quickly.
After two or three shots, evaluate:
- Reading too early? → Move or choose a cleaner ball
- Skidding too long? → Move or choose a stronger ball
- Missing the breakpoint? → Adjust speed or target
The pattern sheet gave you a starting idea. The lane gives you the truth.

Step 5: Keep It Simple For Beginners
When I coach young or new players, I simplify everything to three questions:
- Where should the ball hook?
- What arrow do I look at?
- What board do I stand on?
That’s it.
I do not talk about:
- Volume per zone
- Forward versus reverse loads
- Oil ratios in detail
Instead, I say: Let’s pick one line. Let’s see what the lane tells us. Then we adjust. Confidence grows when the brain is not overloaded.
My Coaching Philosophy on Lines
This is the foundation of how I teach it:
- Lines are tools, not identities
- You do not “play a line” - you read a lane
- The best bowlers do not guess - they observe faster
A map does not drive the car. A GPS does not hit the brakes. And a pattern sheet does not roll the ball. You do.
Use the sheet to:
- Get oriented
- Choose a smart starting area
- Avoid wasting frames
Then let your eyes, ball motion, and experience finish the job. That is how I teach lines. Not as strict rules - but as thinking tools.
More Articles From Coach Vardakis

About the Author Panagiotis Vardakis
Panagiotis Vardakis is an experienced bowling coach and educator whose
involvement in the sport spans more than two decades. His work combines technical coaching, long-term player development, and
equipment knowledge, supported by his experience as a professional coach and
pro shop specialist.
Throughout his coaching career, he has guided athletes to national and
international success across European competitions, coaching players from
Greece, the United Kingdom, Malta, Slovakia, Cyprus, and Bulgaria.
A significant part of his work is dedicated to youth development, where he focuses on structured training environments that support both athletic progress and personal growth.
Vardakis is currently involved in youth-oriented projects through BYC in Slovakia and continues to work with athletes, clubs, and organizations through coaching programs, clinics, and educational initiatives across Europe.
For coaching-related questions or inquiries, Coach Vardakis can be contacted via email at p.vardakis@gmail.com or visit www.byc.sk
Your Weekly Bowling Digest
The latest bowling news, tips, and gear reviews—all wrapped up in a quick 3-minute read delivered straight to your inbox.